Installation: 2 simple steps
1. Connect your Pool
WIFI connectivity at your pool is required. The easiest is to go there with your phone. Switch off the mobile connection, and see with your phone if you have wifi connectivity next to the pool pump. If you do not have Wifi, there is a beneficial solution: You can get wifi by buying a Wifi extender. The advantage is that it will also give you wifi around the pool.
2. Install your Relay
Now with Wifi assured you need a simple Shelly: Here you find the compatible Shelly for the Pool configuration. It is usually delivered within few days.
Once you receive it, first power it up by connecting (N and L) to your home electricity. Next get the Shelly app, and follow the steps to hook it up to your home wifi. Make a software update of the Shelly to get the latest version. In any case, there is help with Shelly issues.
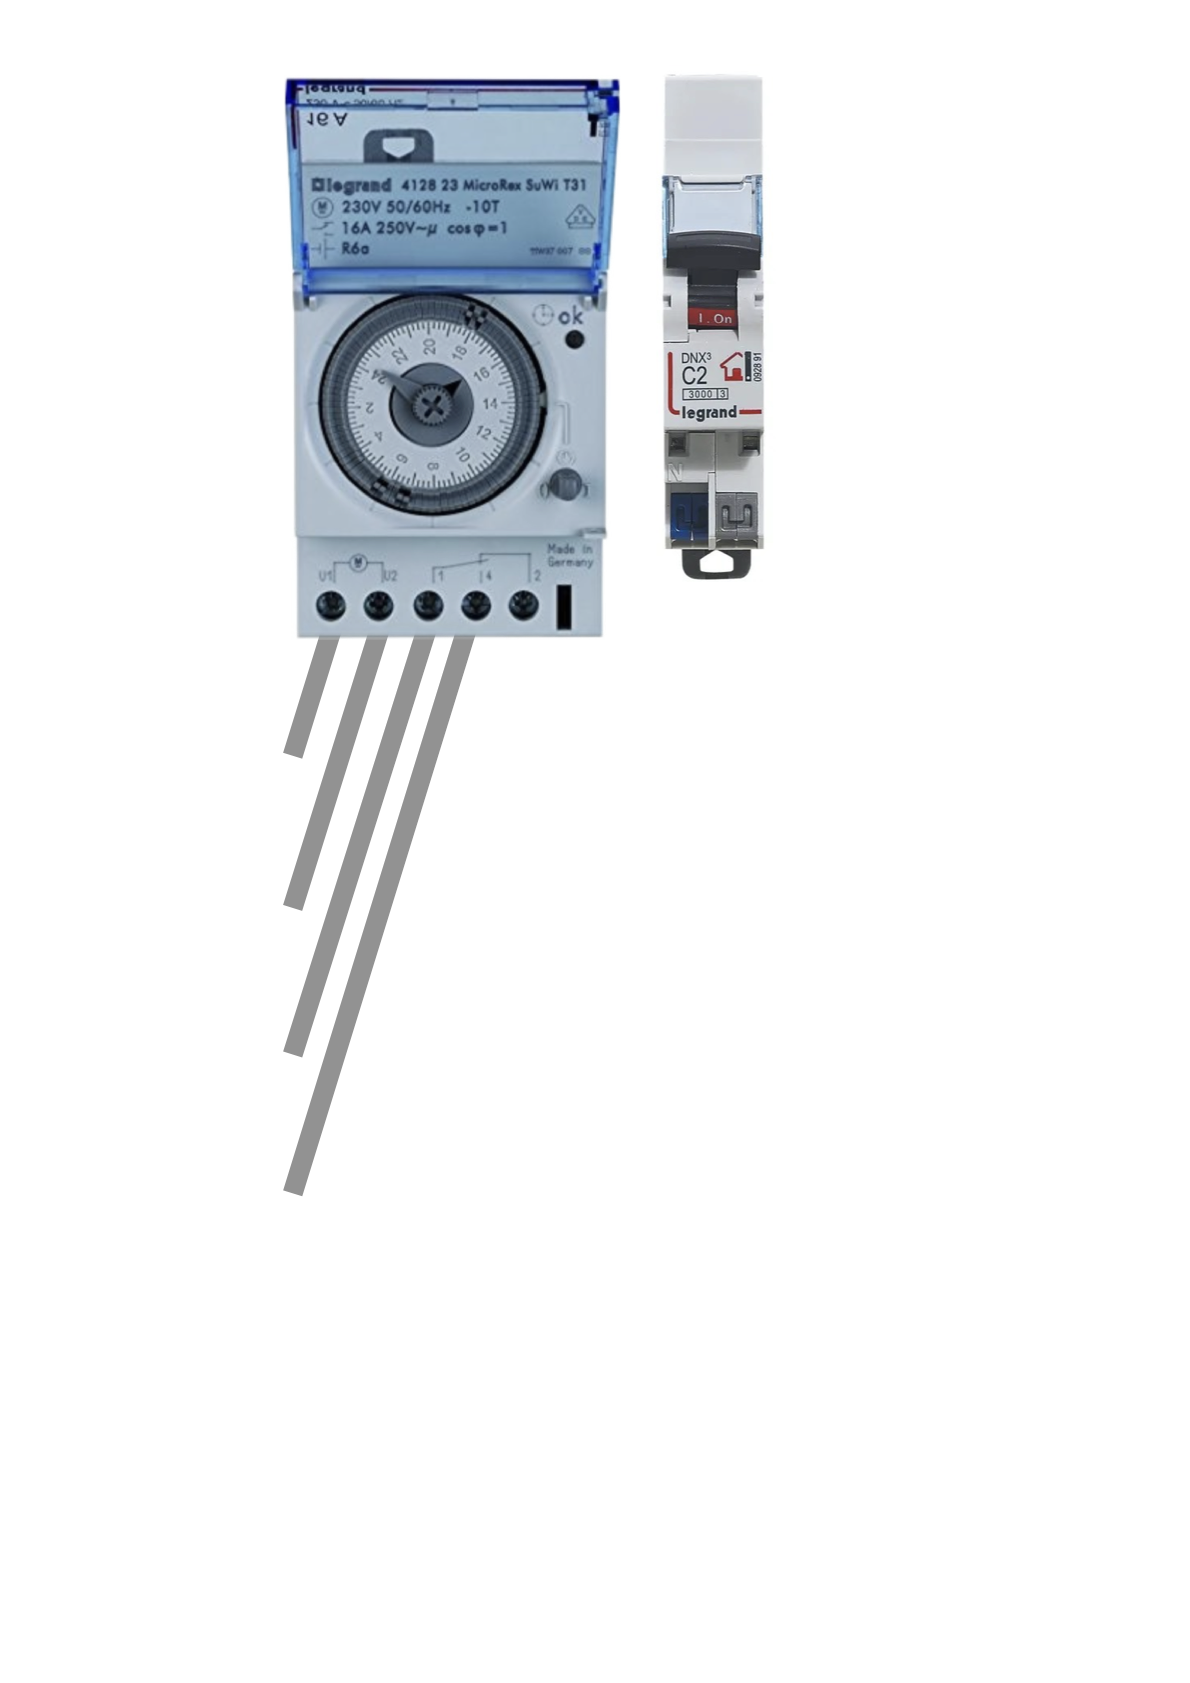
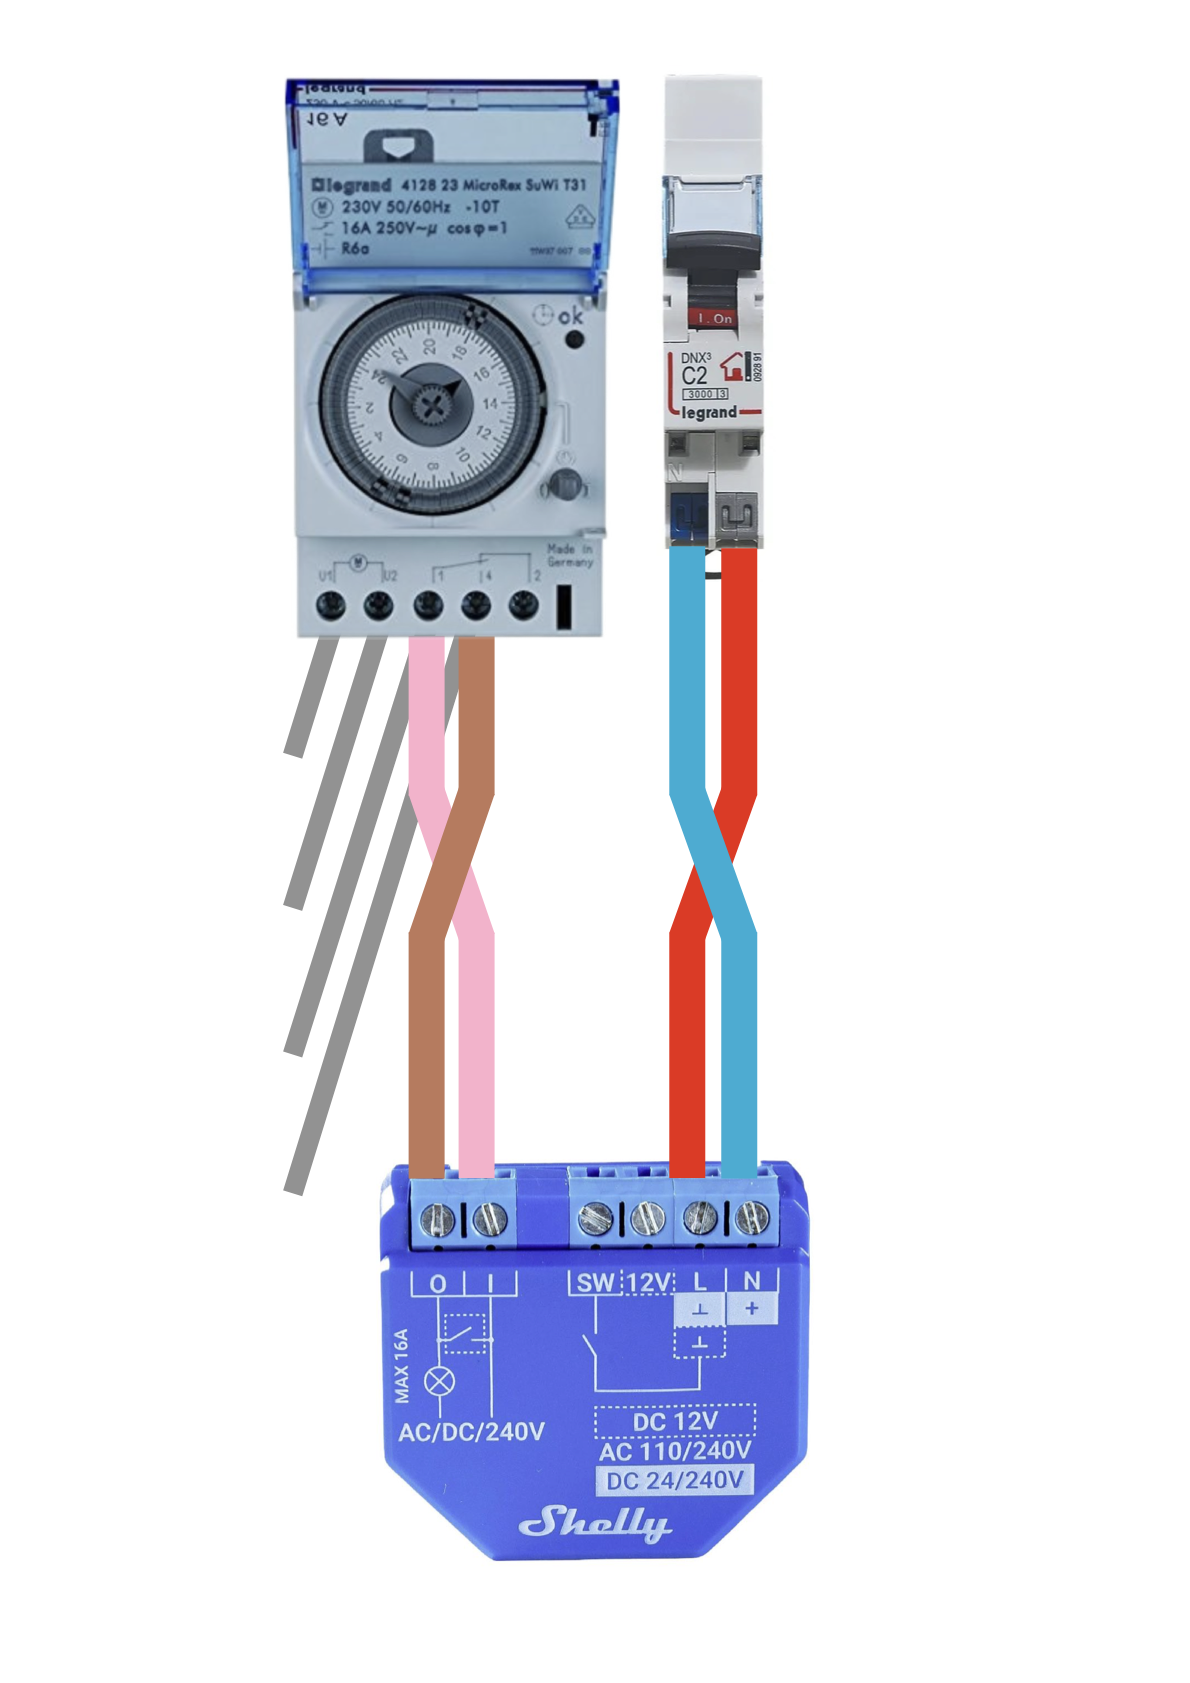
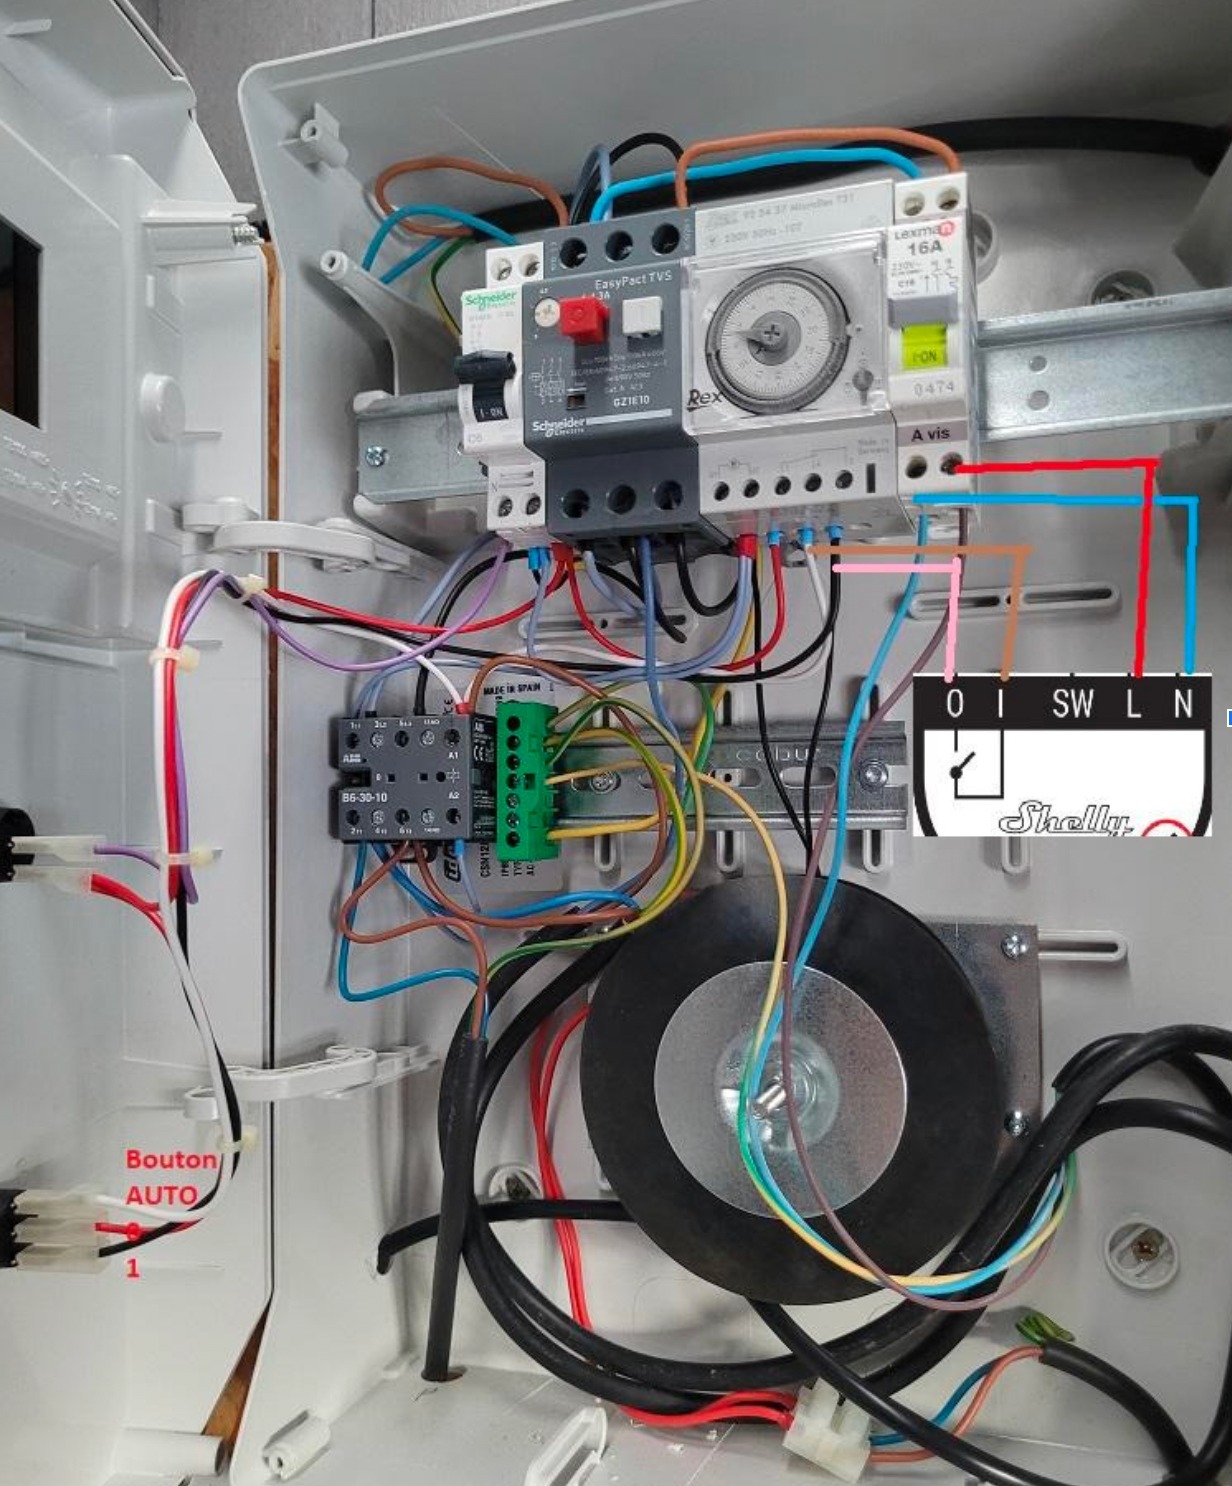
Next we are going to connect it to the pool pump timer. Pool builders will give you some timer to adjust when the pool filtering is running, below we show a popular model, other installations are similar. With the Skypaas Pool installation you will put the Shelly in parallel to the existing timer, so you can keep it for backup. The other advantages of the Skypaas Pool installation is that you only have a second timer in parallel, the buttons on your pool cabinet work as before:
- Switching OFF your old timer It is sufficient to switch OFF your old pool timer, and to leave the button on the pool cabinet door on automatic (as before), Skypaas Pool will now manage the filtering hours.
- Pool Maintenance: as before Also maintenance works just as when you had your old timer active: You switch OFF the button on the pool cabinet door and you are guaranteed that the system will not start, even if Skypaas Pool asks for it.
- Backwash: as before Running the backwash is also like before: You switch ON the button on the pool cabinet door to permanently run the pump 24/24, just as you did during backwash before, Skypaas Pool can not stop your backwash.

That was it. Let's manage the filtering automatically based on the pool water temperature, and the energy price. For that we only connect your Pool Shelly to Skypaas Pool.